Last summer I was into all kinds of crafts, mostly quilting, but I did many others as well. I found a furniture one online that looked like fun and even looked like I could do it on my own. I'd been wanting a new coffee table any way. My coffee table was cast iron and glass. My neighbor's two
year old little boy was here and promptly got up on the table and
started bouncing. We got him down before he hurt himself, but I thought
maybe a glass table isn't the best table to have. I'd seen several different online instructions for penny and epoxy finishing for tables, counters, and even floors. I decided to try for a coffee table. The best instructions I found are linked
here.
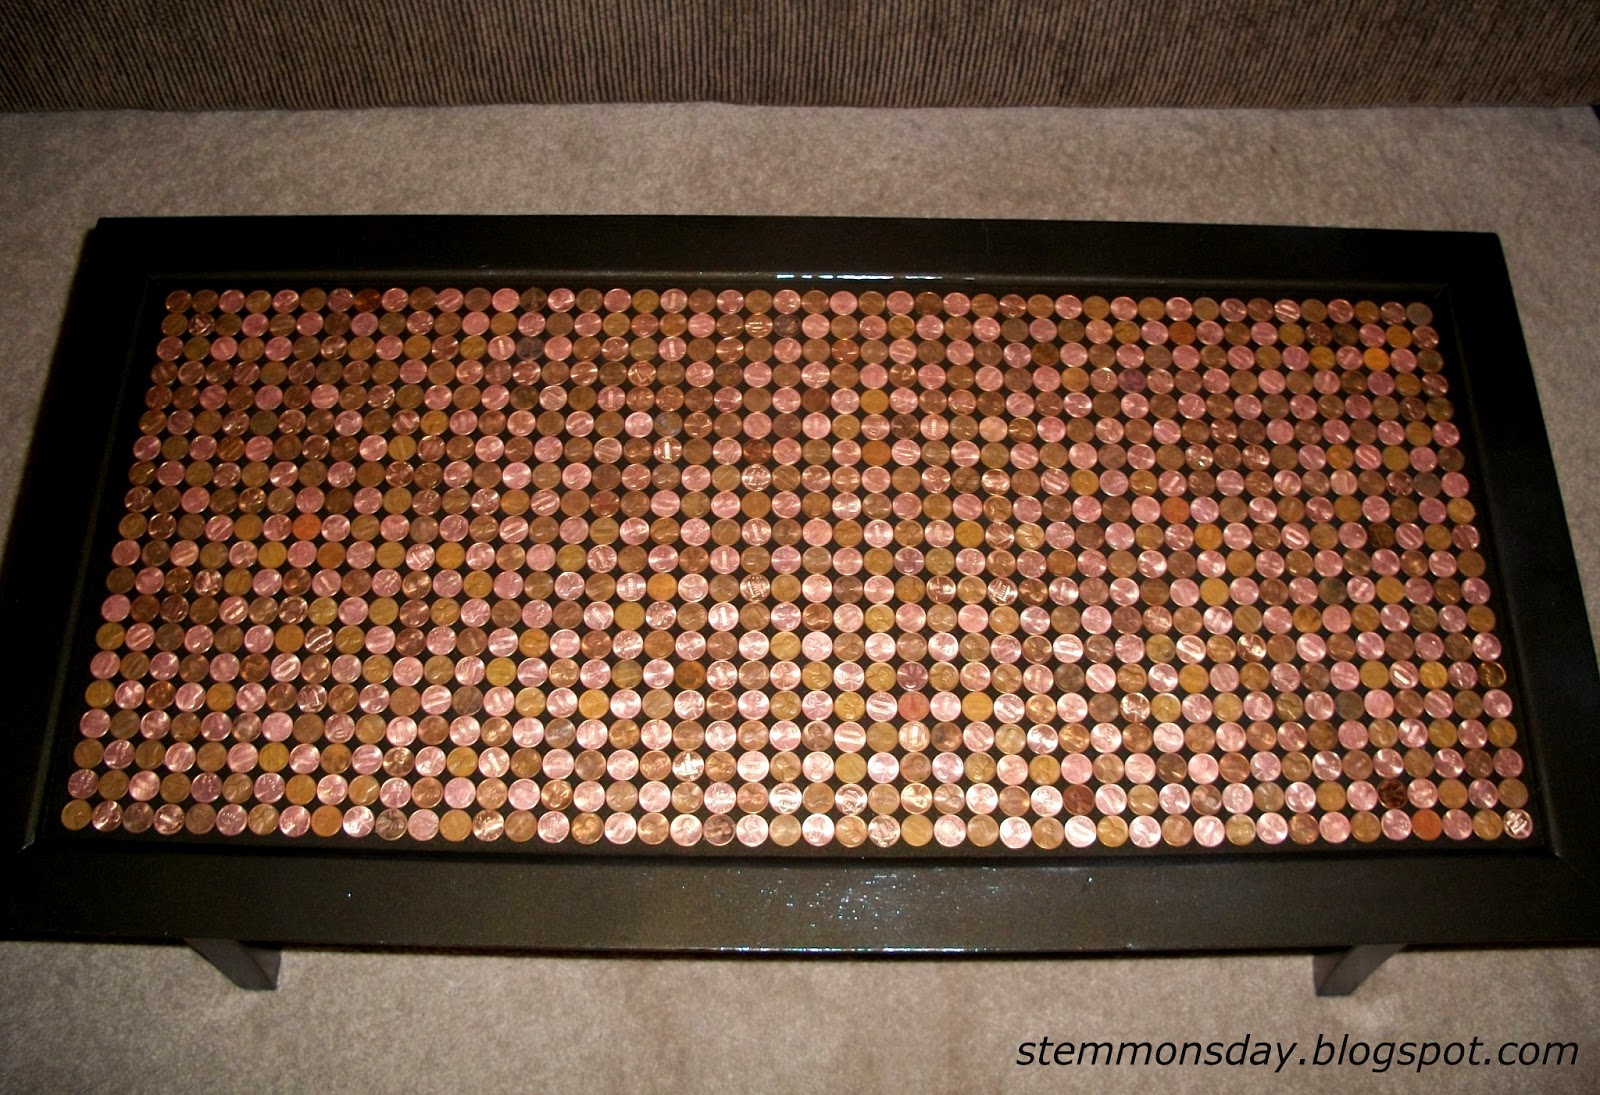
At the local thrift store I bought a wooden table with a lip on the edge. (So I wouldn't have to worry about messy epoxy drips.) I didn't like it's red color against the pennies so I primed and then painted it with oil rubbed bronze spray paint. I got my pennies from around the house and from the bank. Pennies oxidize easily and really none of them were very shiny. I separated the darkest colors from the brighter colors, then shined the brighter ones with Tarn-X.
I arranged the pennies checker board style, alternating the shiny and the dull. If you stand back from the table you can only see the shiny pennies, which is kind of cool. The instructions I followed had the pennies nesting and in a non-pattern pattern. I find that kind of non-pattern exhausting since my eyes are always looking to connect patterns. I made my pattern a very obvious one and I lined up the pennies straight so I wouldn't have to trim any of them to fit in a rectangle.
 |
| Penny table with flash. |
 |
| Penny table without flash. |
After I lined up the pennies along the side and the bottom of the rectangle I started gluing them down as I went. I used Gorilla glue and when I changed my mind on a part of the design, the glue wasn't dry yet so the pennies weren't too hard to remove. When the pennies were all in place I mixed the epoxy and poured it over the top. The epoxy was the most expensive part of this craft, but I price checked and bought it online for the cheapest I could find. Mixed epoxy does get a lot of bubbles in it and you need carbon dioxide to get them to the surface before they set. I don't own a heat gun so I poked the bigger bubbles with a toothpick and breathed hard on the smaller bubbles. I know some breathing technique from singing so I could get a good long steady blast of air going at the epoxy bubbles. This took a long time though, and I breathed hard for so long that I nearly threw up. I gave up at that point and there are still a few tiny bubbles left in my table.

The epoxy hardens with a glass-like finish and keeps the pennies from oxidizing further. I love my coffee table, though it does weigh three times as much as it did pre-penny finish.
Next time: vine painted end tables.