Thursday, November 14, 2013

Pilgrim Dolls and Mayflower Family History

If your here to read the Mayflower family history, skip to the bottom.

My aunt Ruth made some super cute self standing  pilgrim dolls out of coke bottles, baseballs, and gym socks and dressed them up and gave a pair to my mom when I was little. I grew up with them as our only Thanksgiving decor and I played with them every year. They weren't meant to be played with of course, but I was careful.

I decided last year that I would like my own little pilgrim decoration dolls. I thought I would make them like Ruth's; but Mom couldn't find them right away and I decided I could just make my own dolls and dress them as pilgrims for a similar effect. I wasn't sure where I would find full sized glass Coke bottles anyway. I found a doll making book at the library, The Fairytale Doll Book by Valerie Janitch, (1989) which is apparently also available on ebay. I used the pattern for the doll bodies but the head didn't work out, this may have to do with my inability to follow instructions, or maybe the instructions weren't clear. The head turned out like a sideways potato so I scrapped it and drew my own pattern for the head. I also modified the patterns for the clothing to make them fit and to make them pilgrim-like.

I researched pilgrim clothing and found that what we think of as pilgrim clothing with the buckles and tall hats and all black and white is a Puritan style that didn't come into fashion until well after the Mayflower had landed.  I found a great website about it here with pictures and I used those as my guide.

 I didn't entirely stick to accuracy however, I kept the colors somber and the "pilgrim hat" and belt buckle just for recognition's sake. 


 I also modified the cap to show the hair since it's cuter to me.


 These dolls actually can stand on their own, but only without their shoes and at very uncomfortable looking angles so I'm using doll stands to hold them upright. (score one for the Coke bottle)


 I'm not sure what the material is called that I used for the neck ruff/petticoat. It's a sheer, stretchy, lightweight, fine netting that I got on clearance at Walmart. That piece was made with a long rectangle that I gathered 3/4 of an inch from the top of the wider side, then top stitched it down to lay flat and cut two holes in the sides for the arms. (I would have taken a picture of her in just her petticoat to show you, but the dress is a pain to remove and put back on, and Tilley here is too modest anyway. Seriously, she blushed when I lifted her skirt.)


  I've named them  Howland and Tilley for two of my Mayflower ancestors.


The dolls bodies are made of 50/50 cotton poly broadcloth (even though the pattern called for felt). The cuffs, collar, cap, and apron are made from an old cotton bedsheet. The suit and dress are made from cotton quilting fabric. The hat, belt, buckle, and shoes are made from felt. The hair is crochet thread. The faces are drawn on with a super fine sharpie. They stand 15.25 inches tall. They took a full month to make with the pattern inventing and all the little details and the fact that I was working holiday shifts. I didn't actually finish them until after Thanksgiving last year so this is their first Thanksgiving on display. I wanted them to be strong enough to hold up to light play by children, but we'll see how long they last.


And now for the family history part of this post. If you are not descended from Mayflower passengers, you are still influenced by them and by their descendants. If you are a Mayflower descendant you are special! and also not, because there are millions and millions of us. It does however make history live a little more when you have a personal connection. My mom had told me at one point that I was a descendant of John Howland and Elizabeth Tilley. While researching for this post I tried to find them and how I'm connected. It took several days of
looking through thousands of family tree names, and in the meantime I found a few more Mayflower passenger ancestors. There may be more, but I ran out of steam. If you are my sibling,  we have EIGHT Mayflower passenger ancestors.

For the Shirts cousins here is the line, the names in bold are the passengers. I don't give most spouses, just the thread of descendants.


John Tilley & Joan Hurst Tilley and daughter Elizabeth Tilley who married John Howland- Desire Howland & John Gorham had Temperance Gorham and Joseph Gorham Whose Children married each other (first cousins) Thomas Baxter & Desire Gorham- Joseph Baxter- John Baxter – William Baxter –Zimri Harford Baxter –Eunice Adelaide Seavy Baxter – Mary Jane Broadhead –Ruth Harward- Max Leroy Shirts 


For the Rushton cousins,

John & Eleanor Billington and son Francis Billington & Christian (Penn) Eaton (Widow and third wife of Francis Eaton – a Mayflower passenger) – Isaac Billington – Mary Billington –Lydia Wood – Priscilla Thompson – Sarah Sturtevant –Dudley Leavitt- Dudley Leavitt- Mable Lydia Leavitt- Ned LaMar Rushton

Francis Cooke- Mary Cooke – Mary Tinkham- Shubael Tinkham- John Thompson – Priscilla Thompson- Sarah Sturtevant –Dudley Leavitt- Dudley Leavitt- Mable Lydia Leavitt- Ned LaMar Rushton 

And now for the inevitable list of famous people who are known to share these ancestors.  Enjoy.

John Howland and Elizabeth Tilley 
Joseph Smith Jr.
Emma Hale (seven generations removed)
President Franklin D. Roosevelt
President George H. W. Bush
President George W. Bush
Nathaniel Gorham (Continental Congress President)
Edith Roosevelt (Theodore's wife)
Sarah Palin
Ralph Waldo Emerson
Henry Wadsworth Longfellow
Alec Baldwin
Humphrey Bogart
Christopher Llyod
Chevy Chase
Ted Danson

Francis Billington
President James A. Garfield
Richard Gere

Francis Cooke 
President Franklin D. Roosevelt

President George H. W. Bush
President George W. Bush
Anna Mary Robertson (Grandma Moses)
Dr. Benjamin Spock
Dick Van Dyke
Richard Gere 

My sources are familysearch.org, themayflowersociety.com, and okmayflower.com 


Thursday, November 7, 2013

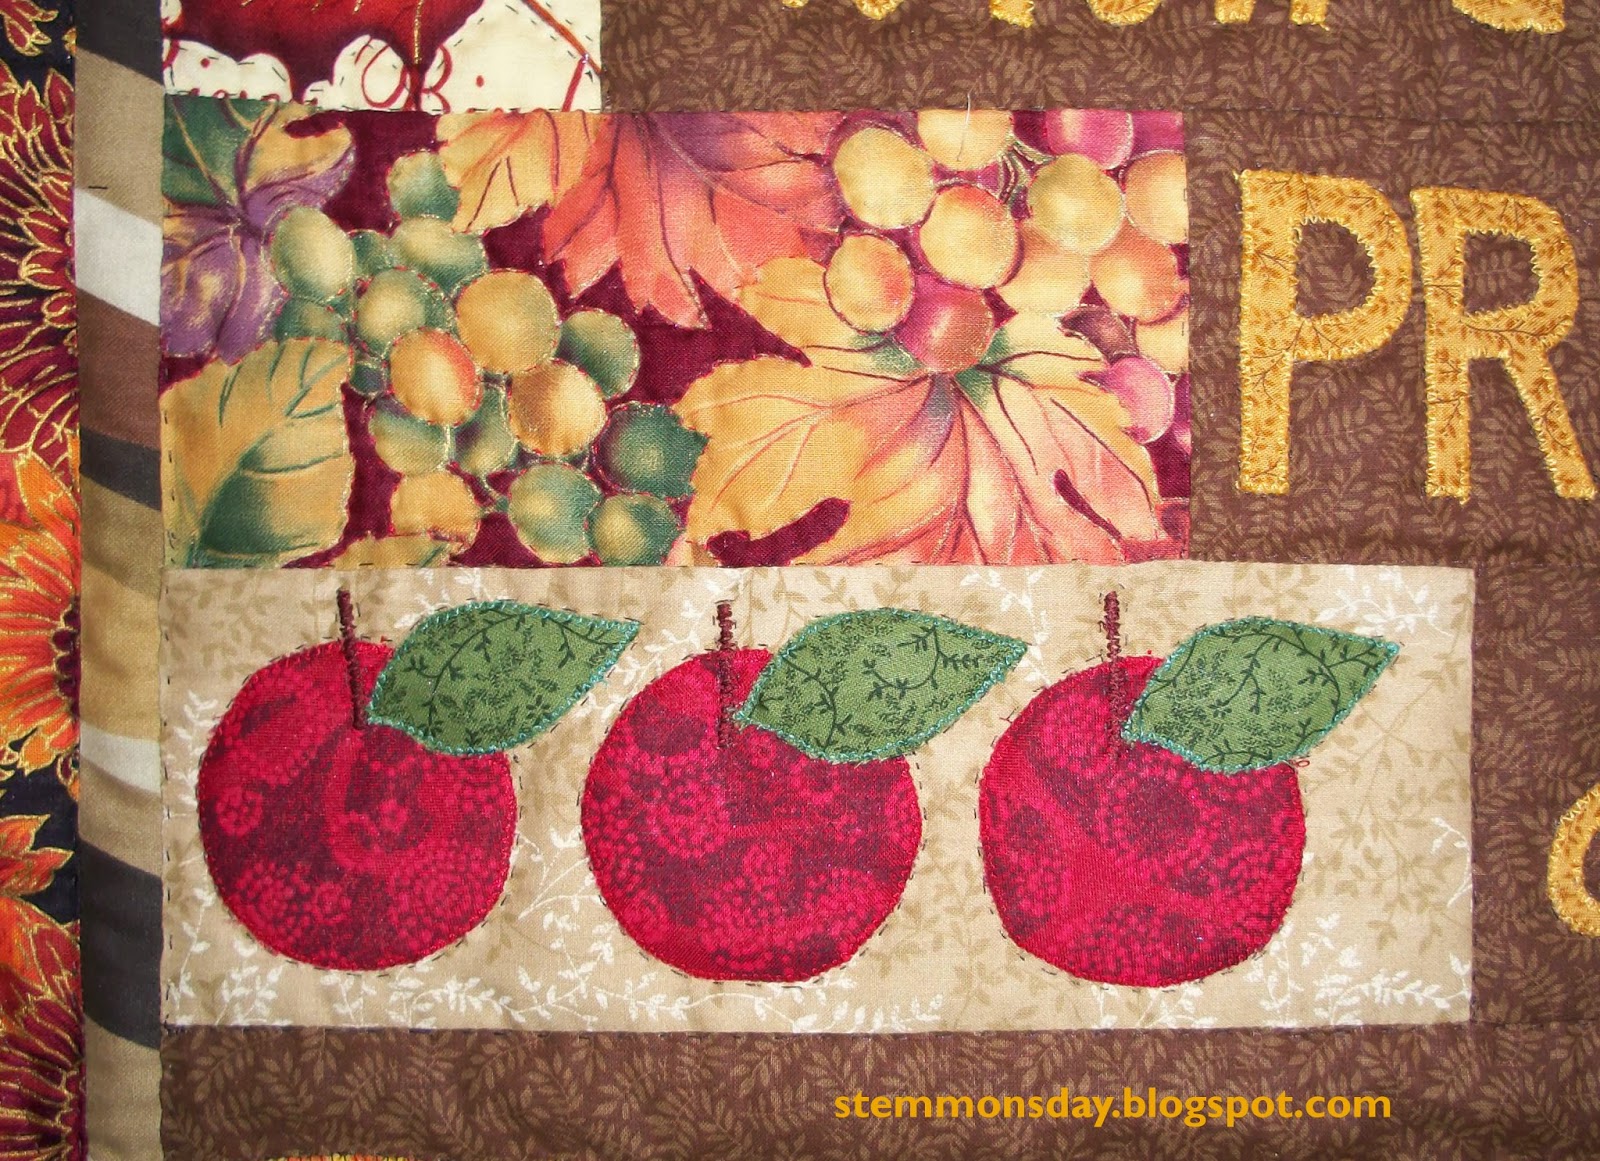
Thanksgiving Quilt

 I just finished this quilt yesterday. I decided to focus my Thanksgiving on giving thanks to the Lord since He is the giver of all gifts. I chose to represent fruits and grains rather than gourds or turkeys out of personal preference.


 Thanksgiving growing up was when my family assembled and my cousins and I played together and ate at the kids table, and my brothers played football in the churchyard with some neighbors and usually got injured in some way but still had a great time.


It was and still is a time to celebrate the people I love and to be grateful for the abundance the Lord has given in food, in blessings, in family, in health, and in joy.


The finished quilt is 26 x 26 inches. I used fabrics from my stash and the only turkeys included are in the fabric on the border. The appliques are applied with fusible webbing and ironed on then zigzag stitched around the edges.

The daily sketches I promised are forthcoming, but I've decided to start another blog exclusively for my drawings and art. I'll post the link when it's ready.

Coming up: Howland and Tilley, The Pilgrim Dolls

Wednesday, October 30, 2013

Goals and a Witch Doll

 I've done a lot since my last post. Most of it wasn't really worth posting about and I got out of the habit but I have some new goals that I want to be accountable for so I'm going to start posting regularly. I have recently paid off my student loan,(Yea!) and quit my day job (Double Yea!) People ask me what I'm doing with myself and in order to not have to say, "you know, stuff", I have set myself a list of goals to accomplish every day.

 I had the personal tragedy of a miscarriage back in the Spring and I stopped my exercise routine, my get-healthy diet and my crafting for the most part. I just spent my free time lying on the couch eating plain chocolate chips, or putting together puzzles that I would immediately tear apart once finished (I always do that with puzzles anyway, but it felt symbolic somehow at the time.) Basically I wasn't doing anything lasting. My hormones have seemed to settle down lately, I'm not crying all the time anymore. I started crafting as I started feeling better and I feel like I'm just about back to my old self now. I'm also back on the treadmill six days a week and back to watching what I eat and counting calories to try to get healthy. I've been going for about a week and a half and I haven't fallen off the wagon yet.

I also have the goal of writing three pages a day in longhand. This is an old habit that I dropped some time ago but it is helpful in draining the brain of all the garbage and leaving room for creative thought. I do this by writing as fast as I can without editing and having the freedom to write anything because no one is allowed to read it but me. This takes a lot of practice, it isn't natural to turn off the inner critic.

Anyway, my next goal is to draw a sketch everyday. preferably a good one, but it doesn't have to be professional or anything. This goal was inspired by the blog drawingsaudade.blogspot.com. She doesn't post regularly now since she has accomplished her goal of drawing and posting a sketch every day for a year. She was also doing this in the recovery of a personal tragedy. I'm mostly doing it so that all those skills I learned at school that I just finished paying for aren't lost through disuse. I can't promise to post everyday, but I will post my daily sketches at least once a week.

My last goal (at least for now) is to write on my book everyday. My brother, Don just wrote an awesome young adult novel and inspired me to get back to work on my young adult novel. I've worked on it off and on, (mostly off) for years. It's time to get going again and make it long enough and an interesting and well crafted novel.  I won't say much more about it until I've finished because it is much more impressive to say, I wrote a book, rather than I'm writing one.

In the midst of all these goals I'm also crafting and quilting. I've made a couple dolls in the last few months and I made two last year that never made it to the blog so I'll post them soon. So far all the dolls I've made are holiday decorations. I'll post them in the order of their respective holidays.

My first doll is my witch. She is about 13 1/2 inches tall and 16 inches tall with her hat. I modified a pattern I found on online here for the doll and had to make up a pattern for the dress and hat. Luckily I've made a dress or two in my time and had a general idea how to make a bodice. The skirt is a simple gathered skirt with a gathered piece of black lace over the top.


The hat is a cone made from a cereal box and lined with black felt, decorated with the last remnant of the dress fabric, (also the fabric of the the big pumpkin from my Two Crows quilt.) I'm wishing I had put more stuffing in her neck or at least used an armature for support since her hat is little too heavy and her head falls back a little, making her look like she is always looking up at the sky. I have to lean her against things for her look straight.You can't see her feet, but she is wearing black lace stockings and no shoes.


The broom is made from a dowel. I rounded the tip using a pencil sharpener and sand paper and the bristles are from a smaller broom pen I found at Smith's in the Halloween section.


Her face is quite different from the pattern. The chin was too square for my taste so I dimpled the sides by stitching through the head with a long needle and securing the stitches at the top of her head before adding the hair, thus making her face a little more oval. I used black crochet thread for the hair and I embroidered the lashes, eyebrows and lips with embroidery floss and used green glass beads for eyes. They look a little funky, but that works for Halloween. I had started, wanting to make an ugly witch, but apparently I'm not capable of making anything deliberately ugly. I always want to pretty things up.

Coming soon: daily sketches and a Thanksgiving quilt.

Tuesday, July 30, 2013

Gumball Wreaths

 I found a cute craft on a website (instructions linked here) I found through Pintrest and decided to try it for myself. I wrapped a foam wreath form with fabric and then hot glued the gumballs on one by one. WARNING: gumballs and hot glue do not part easily. Once I had a gumball glued down, I could not pull it off again without a pair of pliers that destroyed the gumball and still left the glued portion stuck to the fabric. So although my spacing wasn't perfect there was nothing I could do about it. That's OK with me since, although I try my best, I'm not the type that has to intentionally add flaws to my projects in an act of (false) humility. My flaws are all natural, Baby. Rant warning. (I have heard artists and architects claim to add flaws to their design because no one is perfect but God. Well, yes, that is true, but I seriously get irritated at this claim. I don't think the Lord expects people to intentionally hold themselves back from perfection, since our natural mortal state will do that for us. Intentionally adding flaws and pointing them out to claim humility is just old style humble-bragging. I'm so good, I had to add flaws!)
 [Clears throat, steps off soapbox.] 
ahem.

 The gumballs on the original site were all painted one color, which was very cute, but I liked all the colors so I just sprayed them with clear acrylic for a finish.


 I'm not sure how well this would hold up outdoors even with the acrylic coating, so I have it hanging indoors.


Here's my smaller Valentine's Day version.


They are so cute I could just eat them. No need though, I have lots of leftover gum.
Anyone need any gum?

Wednesday, July 24, 2013

Vine Tables

After I finished my penny table that replaced my glass coffee table, I was wanting to replace my matching glass end tables. I decided not to make penny end tables since I was out of epoxy and that stuff is pricey. I found a matched set of mildly damaged end tables at the thrift store for five dollars each. I fixed the loose legs, sanded and primed. They are the type with a diamond shaped wood grain in the center of the table top and therefore hard to paint. I chose to use the rest of my oil rubbed bronze spray paint left over from the penny table for the tops and painted the legs in teal. I wanted to stencil a design on the top in teal as well. I bought a stencil and practiced on cardboard over and over and eventually decided I have zero talent for stenciling. It seems a little silly and I know this will sound like a humble-brag. I have an art degree and can draw and paint my own designs just fine, but I really wanted to stencil since it is supposed to be fast and easy. After some frustration, I gave up and hand painted the tables. They have an identical design so I'm only showing one of them. I had to paint the design over three times to not be transparent over such a dark color.

For any one hand painting or stenciling a design, I make this recommendation: to not do it over a spray painted background as the margin for error is very slim. If you mess up, it would be easier to touch up with regular paint, than wait for the whole thing to dry, then tape over all but the offending spot and spray to cover. I was very careful to not have to do that, but like I said, I had wanted a quick craft and this took some time. After the tables dried I coated the top in polyurethane and called it good.


 A couple weeks later I got this sweet little seventies style bedside table for ten dollars at the thrift store. I needed it hold up my printer. (since the top of our desk is apparently dedicated to holding all kinds of loose papers.) I used the same teal paint and dirtied up the surface by dry brushing on some wood stain, then varnished over the top. I use the drawers to hold printer paper and scratch paper.


 Next time: Gumball Wreaths.